
![]()
IMPORTANT: 1-800 Notify is now fully integrated with Allscripts and can pull your schedule directly from your system (no manual export/upload is required). Just ask us at support@1800notify.com
This article shows you how to move an exported file (e.g. Schedule Export File) from your Allscripts Professional Suite hosted system to your desktop so you can securely upload it to your account at www.1800notify.com
Need to know how to export the schedule from Allscripts Pro? Click here.
1. Login to Allscripts Pro.
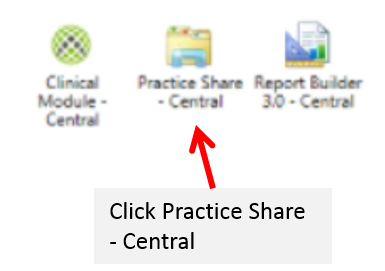
2. From the main dashboard, double-click on Practice Share - Central
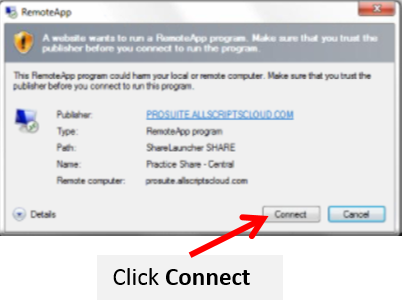
3. You may see a pop up window, click Connect.
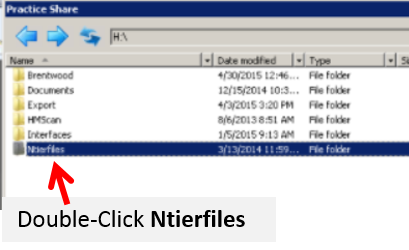
4. Now a Practice Share browse window will pop-up. Double-click the Ntierfiles folder.
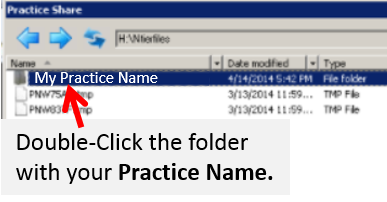
5. Double-click on the file folder with the name of your practice.
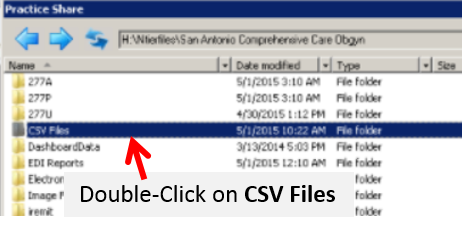
6. Double-click on the CSV Files folder.
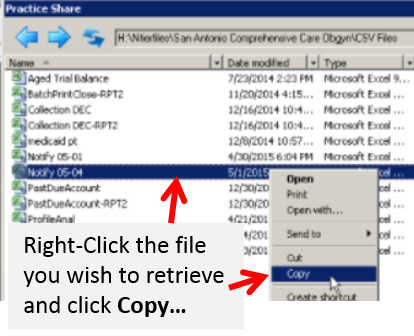
7. Now you will see a list of CSV files you have exported from Allscripts Pro. Locate the file you wish to copy (usually you named it with the date of the appointments, like Notify 05-04)
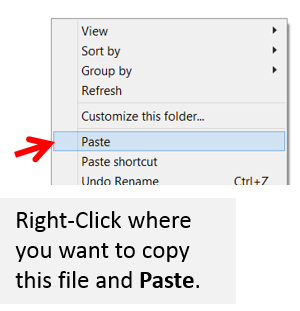
8. Now, you can paste this file anywhere on your computer so you can easily find it to upload it to your secure account on www.1800notify.com. Usually, your desktop or a new folder you create for this purpose works well.
Right click and paste this file into the folder. Now you have it on your own computer and can access it to upload it later.
Now, you're done moving the file to your computer so you can upload it to 1-800 Notify.
Comments