
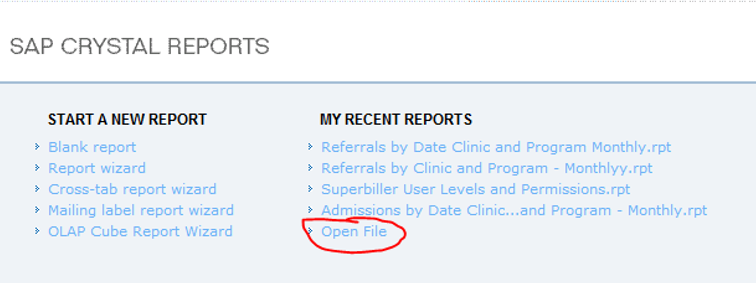
In order to export the schedule to a file that can be uploaded to generate CALL or TEXT message reminders in 1-800 Notify, please follow these steps.
1. Open up Crystal Reports and click the Open File link under MY RECENT REPORTS
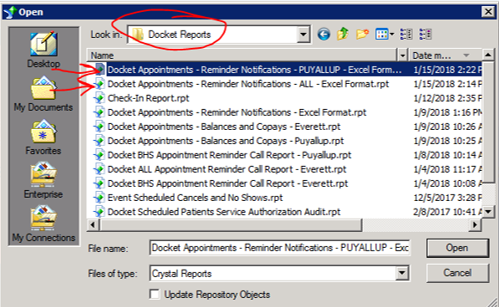
2. Navigate to the Docket Report folder, and select the correct Docket Appointment report by double-clicking on it, or clicking once then clicking Open.
Initially, this will be just the PUYALLUP one. After roll-out, you will pull the "ALL" one shown below it to pull all locations' schedules.
3. Click the icon at the top of the Crystal Reports page so you can adjust the date of the appointment shown.
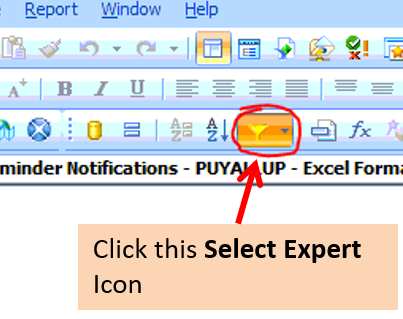
4. Click on the schedule1.startdate tab at the top.
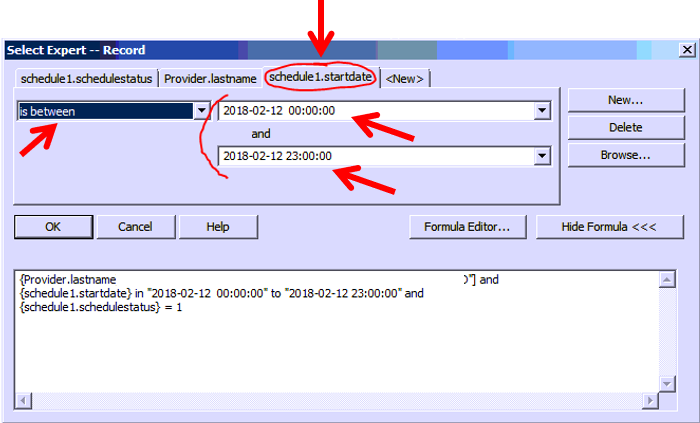
Make sure is between is selected
Then select the start date at 00:00:00 (midnight)
and End date at 23:00:00 (11:00 pm) keeping the format the same
YYYY-MM-DD HH:MM:SS
So to select appointments for Feb 12, 2018, you would enter:
2018-02-12 00:00:00
and
2018-02-12 23:00:00
Then click OK
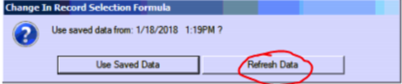
5. Click Refresh Data on the next screen.
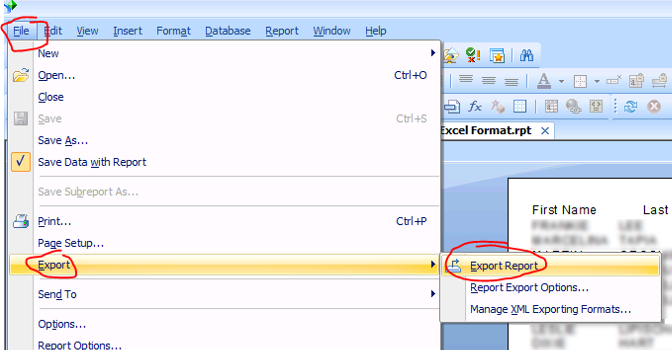
6. Once the report preview loads on the screen, verify you are looking at the correct patients, appointment date and location(s).
Then, click File > Export > Export Report.
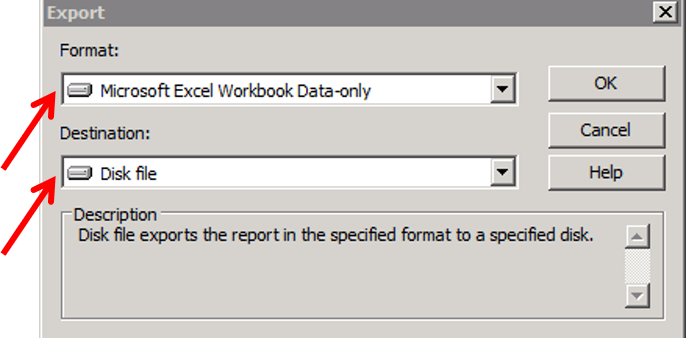
7. Select Format: Microsoft Excel Workbook Data-only
Select Destination: Disk file
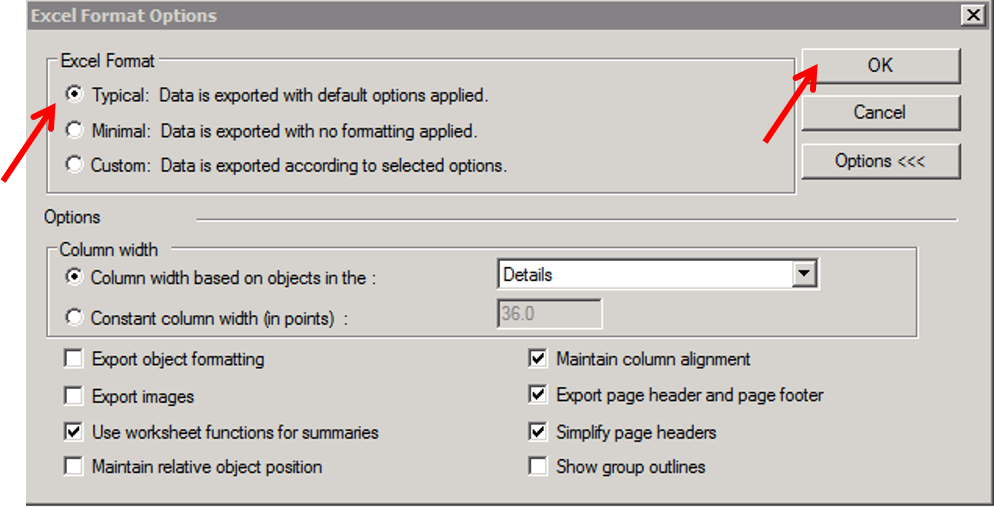
8. On the Excel Format Options screen, make sure the Typical: Data is exported with default options applied is selected. Then click OK.
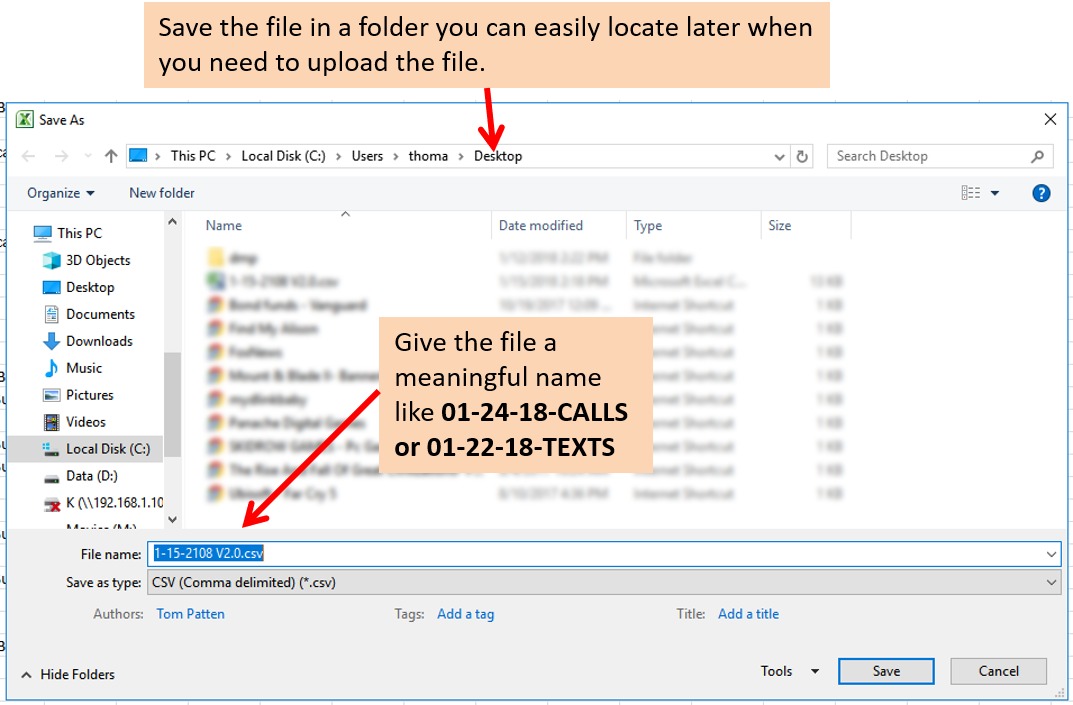
9. Now you can choose where the file is saved and change the name of the file. You can save it on your desktop or create a new folder to store all your schedule export files.
You should name the file something meaningful that is easy to find when you need to upload it later to your account on 1-800 Notify.
Example, if you were exporting the 3 day ahead schedule for sending reminder calls for appointments scheduled on Jan 24th, 2018, you might name the file 01-24-18-CALLS
Similarly, if you were exporting the 1 day ahead schedule (for Jan 22nd) for sending text reminders, then you might name the file 01-22-18-TEXTS
Make sure you get both days exported into separate files.
Call file should be appointments 3 working days ahead of today.
Text file should be appointments 1 working day ahead of today.
=== YOU'RE DONE WITH THE EXPORT ===
Next, follow the instructions in the article linked below to login and upload the reminder message.
You'll be uploading the CALL file to the message called: A-Use-this-for-CALLS
and the TEXT file to this message: B-Use-this-for-TEXTS.
https://1800notify.zendesk.com/hc/en-us/articles/360056925271
Comments