
![]()
This article assumes you've already created a custom report that has pre-set days ahead (e.g. 1D = 1 working day ahead of today and 2D = 2 working days ahead of today) using the steps found in this related article (https://1800notify.zendesk.com/hc/en-us/articles/217935083) and you simply want to run that report and export the results.
IMPORTANT: 1-800 Notify can also work with Epic Systems in a fully hands-off automated manner (no manual running of reports and exporting them by your staff) - all we need to make this happen is that your Information Systems Dept. that controls your Epic implementation enable something called Automated Notices. If you're interested in learning more, please email us at info@1800notify.com.
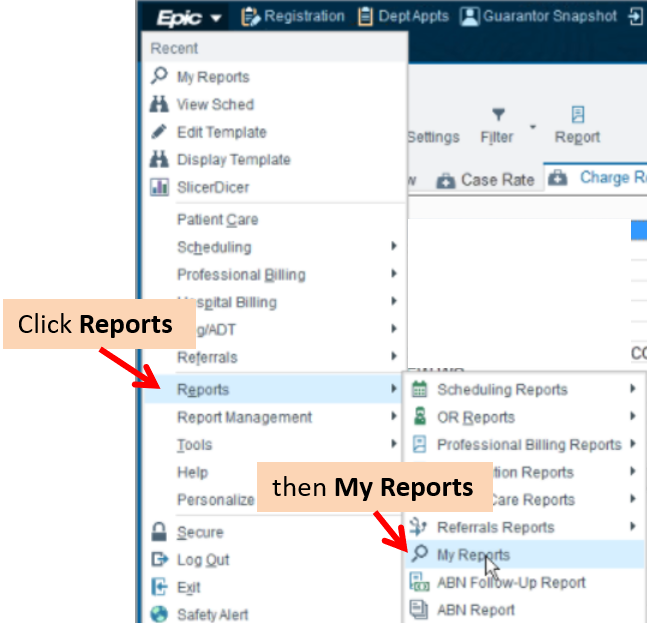
STEP 1: From the Epic Systems menu, click on Reports, then My Reports
STEP 2: Locate and run the correct for today's day of the week and days ahead.
Here's how the reports are named:
If today is Tuesday, you'll be running a report with "Tu", "Tue" or "Tuesday" in the name.
If you want to run a report for the 1 working day ahead patients, you'll be running a 1D report.
If you want to pull patients for 2 working days ahead, you'll run a 2D report.
For example, to pull 2 days ahead patients and today is Thursday, then you'd pull the 2D-Thursday report.

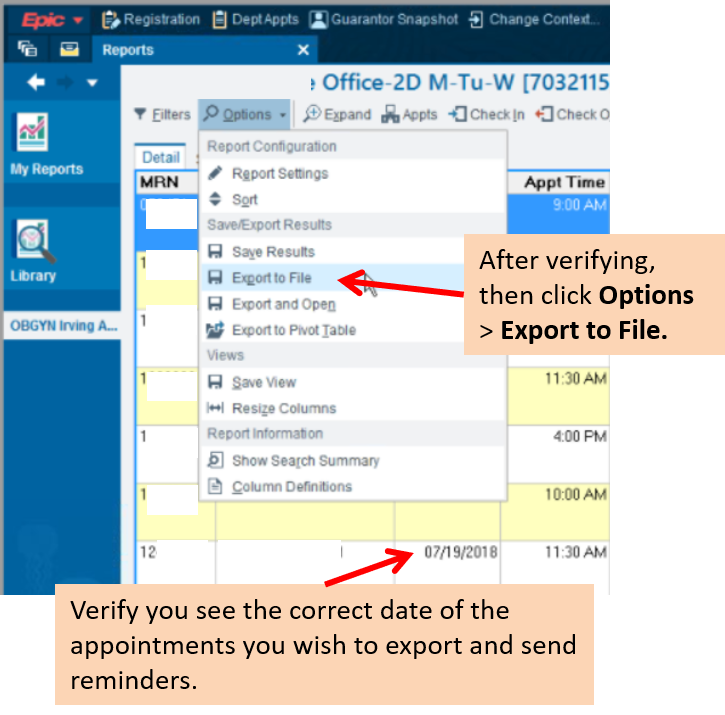
STEP 3: Verify that the date of the appointments you see are correct and then click Options > Export to File
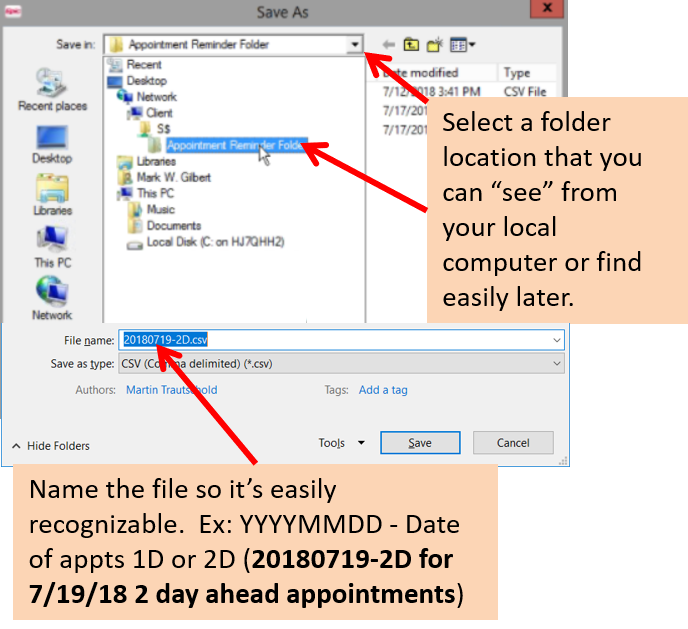
STEP 4: Name the exported file a name that is easily recognizable and in a folder that you can see from your local computer.
For example, if you are exporting 2 day ahead patients scheduled on 7/19/18, you would name the file similar to this 20180719-2D
You're done with the Export!
Now the next step is to log into your HIPAA-secure account at www.1800notify.com and upload that file or files!
Here are instructions showing how to get that done:
https://1800notify.zendesk.com/hc/en-us/articles/360054528271
Comments